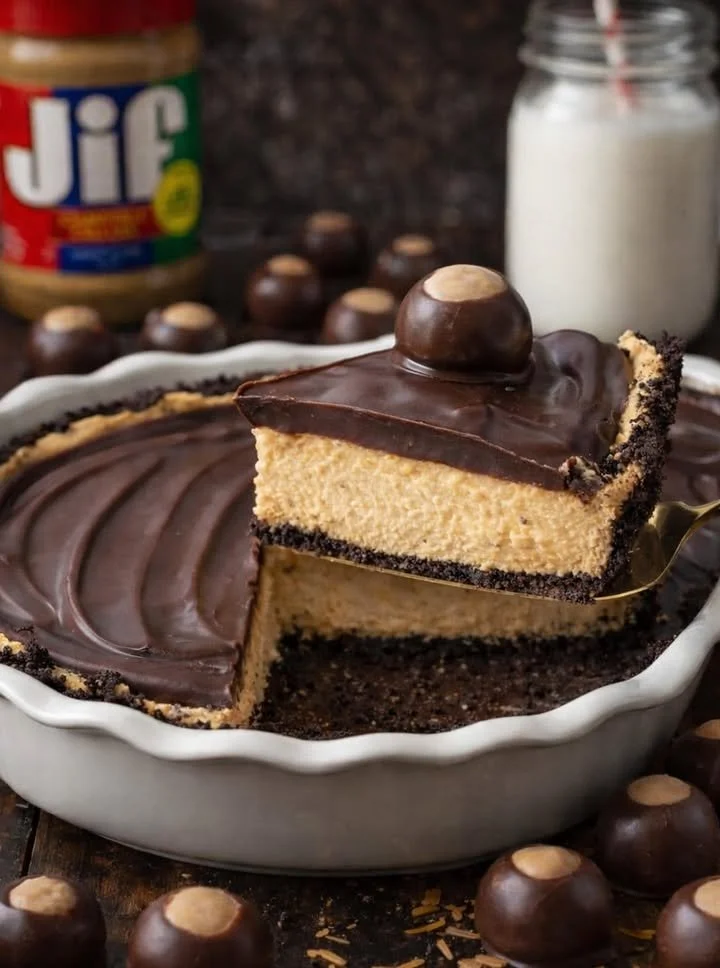
Next, I fold in the freshly whipped heavy cream into the peanut butter mixture, which adds that lovely lightness to the filling. This step is crucial; you want to ensure that you’re gentle when mixing so that the whipped cream maintains its airy texture. Once the filling is ready, I pour it into my graham cracker crust and smooth out the top, which makes it look even more inviting.
Then comes the best part: melting the chocolate! In a small saucepan, I combine the semi-sweet chocolate chips and butter over low heat, stirring until it transforms into a silky smooth ganache. The rich chocolate aroma is intoxicating and just screams dessert! After that, I pour the chocolate ganache over the peanut butter filling, allowing it to drizzle down the sides for that beautiful, luscious finish.
Finally, I pop the pie into the refrigerator to set for at least four hours, allowing those flavors to mingle and deepen. The hardest part is waiting, but trust me, it’s well worth the patience. Just thinking about cutting into that rich chocolate topping and creamy peanut butter layer makes my heart flutter!
Pro Tips for Best Results
I tested this pie three different ways until I found the perfect balance of flavors. For an even richer peanut butter taste, adding a touch more peanut butter works wonders. I recommend tasting the filling before pouring it into the crust—sometimes I add a sprinkle of sea salt to enhance the flavors.
When it comes to the crust, using a homemade graham cracker crust adds an extra layer of deliciousness. I experimented with store-bought crusts, but there’s just something special about the fresh crunch of a homemade one. If you’re short on time, though, the pre-made crust is still fantastic!
Lastly, don’t skip the chilling time! I once cut into the pie too early, and it ended up being a messy affair. Allow the ganache and filling to set properly for that divine slicing experience—trust me, it’s a game changer!
Common Mistakes to Avoid
One common mistake I’ve made in the past is not softening the cream cheese properly. If it’s too cold, you’ll end up with lumps in your filling that can affect the creamy texture. I always allow it to sit out for about 30 minutes before starting to work on the pie.
Another issue can arise with the chocolate ganache. Melt it over low heat and be patient! I once tried to rush and ended up scorching the chocolate, which resulted in a bitter flavor that was less than ideal. Slow and steady wins the race here—your taste buds will thank you!
Also, I’ve learned to avoid skimping on the chilling time. If you cut into the pie too soon, the layers may not hold their shape, leading to a less-than-attractive presentation. Aim for the four hours in the fridge, or prepare it the night before!
Finally, always check your measuring cups. I once added a cup of peanut butter to the filling, thinking it was only half a cup, and the pie turned out way too dense! Make sure to double-check your measurements for the best outcome. (See the next page below to continue…)