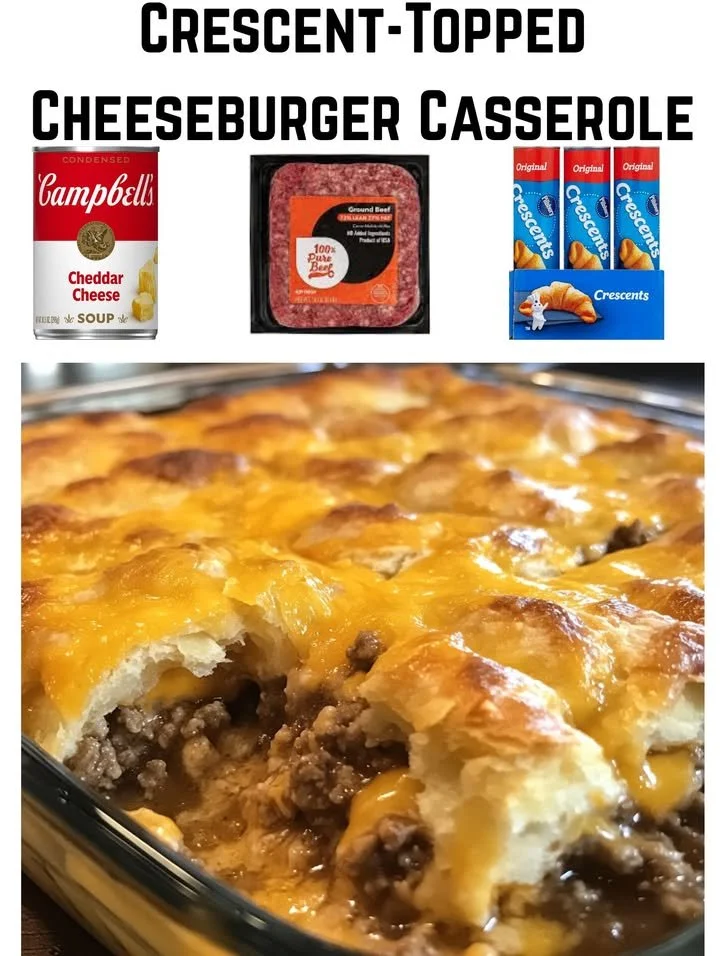
Next, I lower the heat and let the mixture simmer for a few minutes, allowing all those flavors to meld. While that’s happening, I preheat my oven to 375°F (190°C). Then the fun part comes: I stir in half of the shredded cheddar cheese. The melty goodness is already making my mouth water! Now, I grab my trusty 9×13 inch baking dish and pour the beef mixture evenly into the bottom. It’s looking delightful already.
Now comes the crescent roll dough! I carefully unroll the dough and lay it over the beef mixture, making sure to pinch the seams together so it covers the filling completely. I love how the dough puffs up while baking, creating a golden, flaky top that’s irresistible. Before popping it into the oven, I sprinkle the remaining cheese on top to give it that extra cheesiness everyone craves. Baking this delightful creation for about 25 to 30 minutes, I watch as the crescent dough rises and becomes golden brown, and the cheese bubbles up.
Once done, I take it out and let it cool for a few minutes. The morsels of beef, melty cheese, and flaky dough look so inviting that it’s hard to wait, but trust me, it’s worth it to allow those flavors to settle. I top the casserole with fresh lettuce and pickles for that complete cheeseburger experience, and then it’s time to dig in!
Pro Tips for Best Results
I’ve made this casserole a few different ways, and I found a couple of changes that really enhance the dish. For instance, I sometimes sauté chopped bell peppers along with the onions. They add a vibrant color and a slight sweetness that elevates the flavor even more. If you’re a fan of spice, throw in some chopped jalapeños or a splash of hot sauce—trust me, it’s delicious!
Another tip is to be mindful of the cooking times for the ground beef. If you overcook it, the meat can end up dry. Keep an eye on it, and remember that it’ll continue to cook in the oven. I also recommend mixing in a bite of mustard for that extra cheeseburger kick before baking. It’s a little trick that makes a huge difference!
Lastly, don’t shy away from experimenting with different cheeses. While cheddar works beautifully, I’ve had great success using Monterey Jack or even pepper jack for a little kick. Mixing cheeses also creates a lovely, complex flavor profile that’s worth trying!
Common Mistakes to Avoid
One common mistake I learned the hard way is not allowing the casserole to cool a bit before serving. Cutting into it too soon can lead to a gooey mess instead of those perfect, clean slices we all love. Patience is key! I once ended up serving a big pile of delicious goo instead of neat portions—definitely a lesson learned.
Another thing to keep in mind is not to skip draining the excess grease from the beef. It can make the casserole greasy, and trust me, no one wants that. After browning the beef, I always ensure I have a decent amount of grease removed.
Baking time is also crucial. Every oven is different, and sometimes it can take less or more time than expected. I’ve pulled pans out only to find the dough was too doughy because it needed a few more minutes. So, checks it a few minutes before the end and keep an eye on that golden color.
Finally, if you’re feeling adventurous with toppings, remember to add them after baking. I once added lettuce and tomatoes before serving it, and they became wilted and sad. Fresh toppings make all the difference!