Next, in another bowl, I mix the softened cream cheese and powdered sugar together until it’s smooth and creamy. The sweet aroma of the cream cheese and sugar blending together fills my kitchen, and it makes me even more excited to continue. Then, I fold in the vanilla extract for a lovely, rich flavor. In a separate bowl, I whip the heavy cream until stiff peaks form, which gives the dessert that light, airy texture I adore. Gently, I fold the whipped cream into the cream cheese mixture until everything is well combined. This step truly brings everything to life!
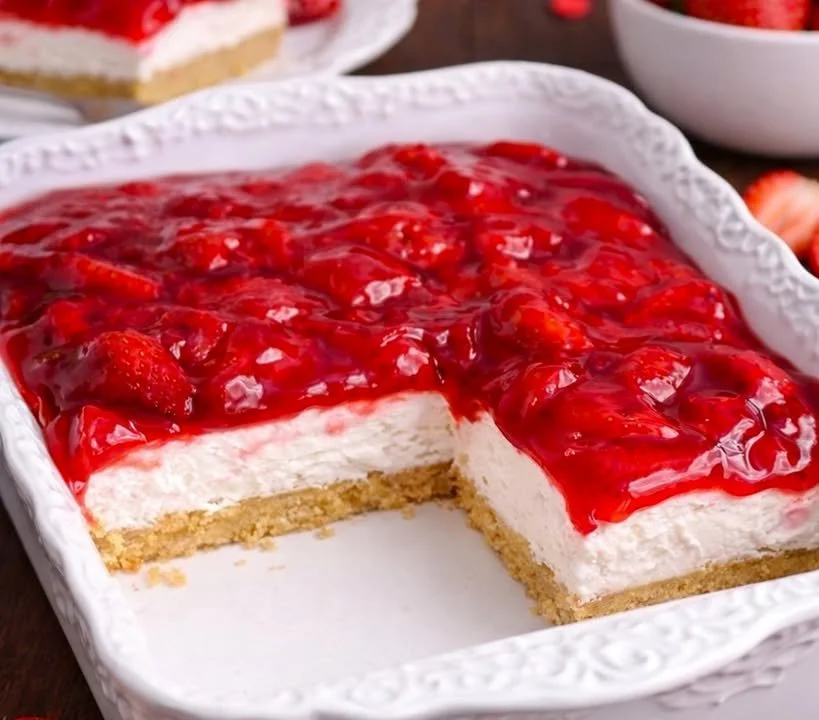
After the filling is ready, I take my crust out of the fridge and start layering. First goes half of the creamy filling over the crust, followed by a layer of sliced strawberries. The colors begin to pop—white from the filling, golden crust, and vibrant red strawberries create a feast for the eyes. I pour the second half of the filling on top of the strawberries and finish with a few more sliced strawberries for garnish. Covering the dish, I let it chill in the fridge for at least four hours, but overnight is even better. The waiting is the hardest part, but I promise it’s worth it!
When I’m finally ready to serve, I slice into the cheesecake delight, revealing those beautiful layers. The cool creamy texture contrasts perfectly with the sweet, juicy strawberries. Each bite is a little taste of heaven! I usually pair it with a dollop of whipped cream to intensify the experience.
Pro Tips for Best Results
To ensure my No Bake Strawberry Cheesecake Delight turns out perfectly, I always use room-temperature cream cheese. I’ve tested this three ways, and creamy cheese makes all the difference! If it’s cold right out of the fridge, it can clump up in the mixture, making it hard to get that smooth finish we desire.
Another thing I’ve learned is to use fresh strawberries. Trust me; frozen berries just don’t have the same vibrant flavor and texture. Nothing beats the sweet, juicy burst of a fresh strawberry in this delight! However, if strawberries aren’t in season, you could also go for topped berry mixtures or other fruits.
Lastly, patience is key! I used to wonder why my cheesecake was always a little too soft, and I learned that chilling it overnight truly makes it firmer and easier to slice. So, give it that extra time, and it’ll pay off with raving reviews!
Common Mistakes to Avoid
One common mistake I’ve made when making this dessert is not pressing down the crust firmly enough. If it’s too loose, you’ll end up with a crust that crumbles rather than holds together when serving. So, I always make sure to use the back of a measuring cup or my hands to really compact it.
Another pitfall is using too much or too little sugar. Balancing the sweetness of the cream cheese filling with the strawberries is crucial. I once used a bit too much powdered sugar, thinking it would enhance the flavor, but it turned out way too sweet and overshadowed the fresh strawberries.
I also learned not to skip the chilling time. I get it; the anticipation is intense, but if you try to dig in too soon, the filling won’t have set properly. This will lead to a messy slice and some disappointed taste buds. Trust me; patience is rewarded!
Make sure you don’t skip the vanilla extract either! It’s one of those little details that contributes to the flavor depth. For some reason, I forgot it once, and the filling just didn’t have that creamy dreaminess that it should have.
Serving Suggestions
I love to serve my No Bake Strawberry Cheesecake Delight with a fresh mint garnish; it adds a bright pop of color and complements the strawberries beautifully. It’s such a classic combination! You can also offer some whipped cream on the side for those who want extra richness with each slice.
This dessert is perfect for summer gatherings. I often pair it with a refreshing glass of lemonade or iced tea for an uplifting, flavorful experience. You could even serve it at a dinner party after a light meal, making it a memorable end to the evening.
Additionally, this cheesecake delight is great on its own or alongside a fruit platter for some variety! The combination of flavors and textures really shines when you have a bit of everything on your plate.
Variations & Customizations
If I’m in the mood for something different, I sometimes switch out strawberries for fresh blueberries or raspberries. The tartness of the berries creates a wonderful balance against the rich cream cheese filling. This also adds a lovely variety that keeps the dessert exciting!
For those who love chocolate, consider adding mini chocolate chips or a drizzle of chocolate sauce on top. I tested this once by folding in some melted chocolate into the cream cheese filling, and I was blown away. It really added an unexpected twist to the classic flavor!
Another fun variation is to add a layer of lemon curd between the layers for a zesty kick. The tanginess really elevates the flavor profile and makes it stand out in a crowd of desserts. The possibilities are endless, and I love experimenting to find new favorites!
How to Store, Freeze & Reheat
Storing my No Bake Strawberry Cheesecake Delight is super easy! I simply cover it with plastic wrap or aluminum foil and keep it in the fridge. It usually lasts about 3-4 days, but I doubt it will hang around that long with how delicious it is!
I haven’t tried freezing this dessert yet, but I’ve read that you can freeze slices for later enjoyment. Just wrap them tightly in plastic wrap and then foil to prevent freezer burn. When it’s time to indulge again, thaw it in the fridge for a few hours before serving.
Reheating isn’t necessary since this is a chilled dessert. However, I will say that bringing it to room temperature for about 10-15 minutes before serving enhances the flavor even more. This little trick makes every bite taste as fresh as the day I made it!
Conclusion
I hope you enjoy making and savoring this No Bake Strawberry Cheesecake Delight as much as I do! With its creamy filling, zesty strawberries, and simple preparation, it truly encapsulates the joys of summer and good company. So, roll up your sleeves and get ready for a delightful journey in your kitchen! Happy baking—or rather, no baking!