Next, in another bowl, I mix the vegetable oil, buttermilk, eggs, food coloring, vanilla extract, and vinegar. The vibrant red hue is so exciting! I then gradually add this wet mixture to the dry ingredients, mixing well until everything is just combined. I’m careful not to overmix here; a light hand goes a long way! Once it’s ready, I divide the batter evenly between the two prepared cake pans and pop them into the preheated oven. I bake them for 25 to 30 minutes or until a toothpick inserted in the center comes out clean.
After baking, I let the cakes cool in the pans for about 10 minutes before transferring them to a wire cooling rack. This is where the kitchen really starts to smell like a sweet haven! Meanwhile, I whip up my cream cheese frosting. In a mixing bowl, I blend the softened cream cheese and butter until creamy and smooth. Then, I gradually add the powdered sugar, mixing until it reaches a luscious consistency. Finally, I stir in the vanilla and a pinch of salt, and trust me, the flavor is unreal!
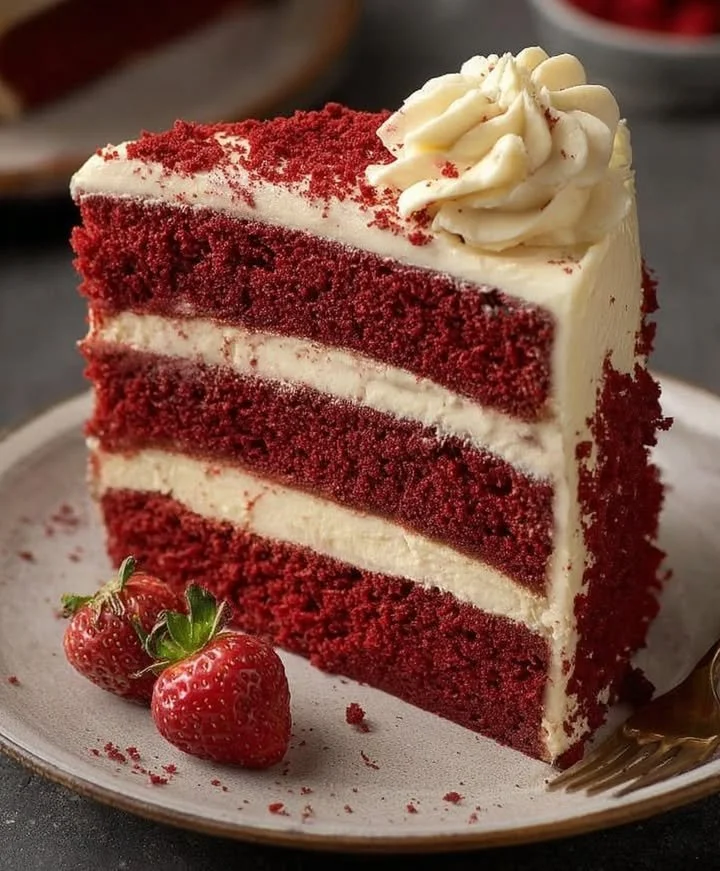
Once the cakes are completely cooled, it’s time for assembly! I place one layer on a serving plate, generously spread frosting on top, and then add the second layer. I finish by slathering frosting on the top and sides of the cake. The vibrant red color against the creamy white frosting creates such a beautiful contrast, and it’s simply irresistible!
Pro Tips for Best Results
I’ve tested this recipe three different ways, and one of my tips is to use buttermilk, not just regular milk. The acidity in buttermilk provides that tender, moist texture that we all crave in a good cake. If you don’t have buttermilk handy, a quick substitute is to add a tablespoon of vinegar or lemon juice to regular milk and let it sit for about 5 minutes.
Another tip I swear by is to let your eggs and buttermilk come to room temperature before mixing. This little detail makes a significant difference in how well the ingredients combine, leading to a fluffier cake. Plus, it prevents the batter from cooling down too much, which can affect the rise.
Finally, when it comes to baking time, every oven is a bit different. I recommend checking your cakes a few minutes before the suggested time; if the toothpick comes out clean but the tops are still lightly springy to the touch, you’re good to go.
Common Mistakes to Avoid
One common mistake I made early on was not measuring the flour correctly. Too much flour can lead to a dense cake, so I always spoon flour into my measuring cup and level it off with a knife for accuracy. Trust me, the difference in texture is worth it!
Another misstep I encountered was forgetting to line the cake pans with parchment paper. I learned the hard way when my beautiful cakes stuck to the bottom of the pans! Now, it’s a non-negotiable step in my baking process.
Also, while it may be tempting to mix the batter aggressively to ensure everything is combined, overmixing can lead to a tough cake. I found that using a gentle folding motion instead helps maintain that soft texture that makes red velvet so special. (See the next page below to continue…)