Next, in a mixing bowl, I combine the softened cream cheese, powdered sugar, and vanilla extract. Using my electric mixer, I blend it all until it’s creamy and well combined. The sweetness from the powdered sugar balances perfectly with the tanginess of the cream cheese, creating a mixture that’s rich yet airy. Once that’s done, I fold in the melted chocolate carefully. The mixture should be a beautiful, glossy chocolate color that promises both richness and flavor.
Now it’s time to transfer this decadence into the pre-made graham cracker crust. I gently pour the chocolate cheesecake filling into the crust, using a spatula to smooth out the top. It’s so satisfying to see it level off, knowing that each slice will be just as perfect. I refrigerate it for at least four hours, or overnight if I can resist the temptation, letting it set and become firm enough to slice.
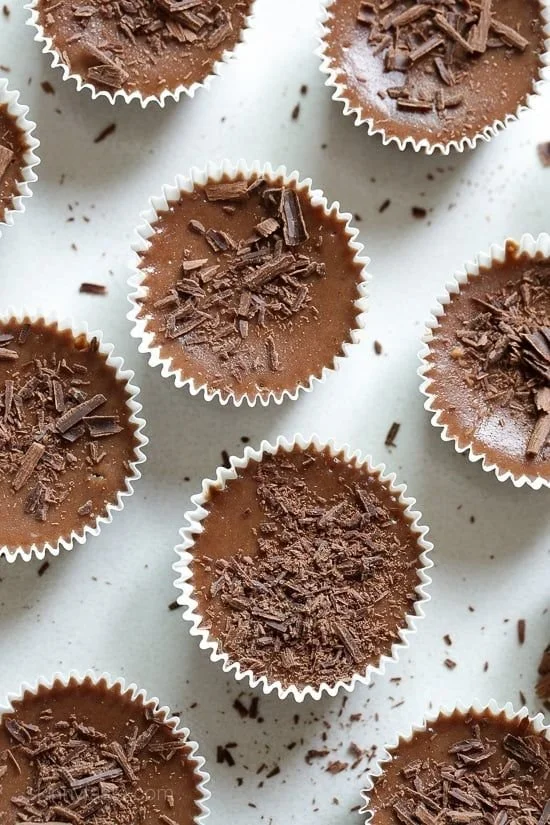
Finally, before serving, I often like to add a sprinkle of chocolate shavings or whipped cream on top to elevate its appearance even more. It’s a small touch that makes it feel extra special. And trust me, the anticipation of digging into this dessert is well worth it!
Pro Tips for Best Results
I tested this chocolate cheesecake three ways—using different brands of cream cheese, and I found that full-fat cream cheese created the creamiest texture. Low-fat options just didn’t have that decadent mouthfeel that I love. I also recommend letting your cream cheese soften at room temperature. It makes a world of difference when you mix it, ensuring a lump-free filling!
Another tip I learned from experience is to have all your ingredients at room temperature before starting. I’ve noticed that room temperature cream cheese and melted chocolate blend together much more smoothly, leading to a velvety cheesecake. It’s a small step that takes minimal effort but significantly impacts the final product’s texture!
Lastly, if you’re a fan of intense chocolate flavor, consider adding an extra tablespoon of cocoa powder to the cream cheese mixture. It deepens the flavor and makes for a more bold dessert. I tried this during one of my experiments, and it took this already delightful cheesecake to a whole new level!
Common Mistakes to Avoid
One common mistake that I made the first time I made this cheesecake was not waiting for the melted chocolate to cool before mixing it with the cream cheese. This can lead to a lumpy filling instead of that smooth, silky texture we’re aiming for. Always let it cool slightly, that’s a very important step! (See the next page below to continue…)
Another pitfall is assuming that a quick chill in the fridge is enough. I’ve tried cutting corners before, but trust me, letting the cheesecake chill for the full recommended time allows it to set properly. Give it that time, and you’ll be rewarded with perfect slices that hold their shape beautifully.
Also, be cautious with how far in advance you prepare it. While it can last for a few days in the fridge, I fancy making it no more than a day beforehand for the best flavor and texture. After a few days, the crust can start to get a little soggy!
Serving Suggestions
This cheesecake is delightful on its own, but presenting it with a few accompaniments can truly elevate the experience. I love serving it alongside fresh berries, like raspberries or strawberries. The tartness of the berries adds a lovely contrast to the rich chocolate cheesecake, making it an extra special treat.
Another idea is to drizzle some chocolate sauce or caramel over the top before serving. This not only looks fancy but also enhances the sweetness, making every bite a little more indulgent. You can also experiment with flavored syrups like raspberry or even a hint of espresso.
For gatherings, I often cut the cheesecake into bite-sized squares and arrange them on a platter for easy servings. No need for plates—just grab and go! It’s a fun, casual way to enjoy this dessert, and it always impresses my guests.
Variations & Customizations
If you want to switch it up, there’s always room for customization with this cheesecake! For a mint-chocolate variation, simply add a few drops of peppermint extract to the cream cheese mixture. It’s an unexpectedly refreshing twist and perfect for the holiday season.
I also tried adding a swirl of peanut butter to the filling—it’s a match made in dessert heaven! Just take a few tablespoons of softened peanut butter and gently swirl it through the chocolate mixture before pouring it into the crust. The combination of chocolate and peanut butter is absolutely divine!
For those wanting to skip the graham cracker crust, you can use a chocolate cookie crust instead. It adds another layer of lusciousness and complements the chocolate flavor beautifully. You could even experiment with a nut-based crust for a gluten-free option!
How to Store, Freeze & Reheat
If you have leftovers (which is rare, but it happens!), storing the cheesecake is super simple. Just cover it tightly with plastic wrap or transfer it to an airtight container and keep it in the refrigerator. It should last about three to four days, perfect for enjoying that deliciousness again!
For longer storage, this cheesecake can be frozen. I recommend wrapping individual slices in plastic wrap and then placing them in a freezer-safe bag. They can be stored for up to three months, ensuring you have a chocolate fix ready whenever you need it! Just remember to thaw overnight in the fridge before serving.
Reheating isn’t really necessary for this cheesecake, as it’s best enjoyed chilled. But if you do want a slightly softened texture, I suggest letting it sit at room temperature for about 15 minutes before digging in. This step helps bring out the flavors even more!
Conclusion
I hope you find as much joy in making and sharing this Five-Ingredient Chocolate Cheesecake as I do! It’s become a staple in my kitchen, and knowing I can whip it up with just five ingredients makes it even more special. Enjoy the process, and let every bite remind you of the simple pleasures in life. Happy baking!