Another pitfall is skipping the chilling time. I know; it’s tough to wait when a delicious dessert is practically staring at you! But I’ve learned the hard way that patience is key. The flavors marry beautifully when left to chill, and the dessert firms up, making it easier to slice. If you dig in too early, you’re left with a drippy mess!
Lastly, I suggest using room temperature cream cheese. When I tried to mix cold cream cheese straight from the fridge, I ended up with lumps in my filling. Now, I always take it out of the fridge ahead of time to ensure a smooth mixture. It’s such a small step that makes a big difference in the final texture!
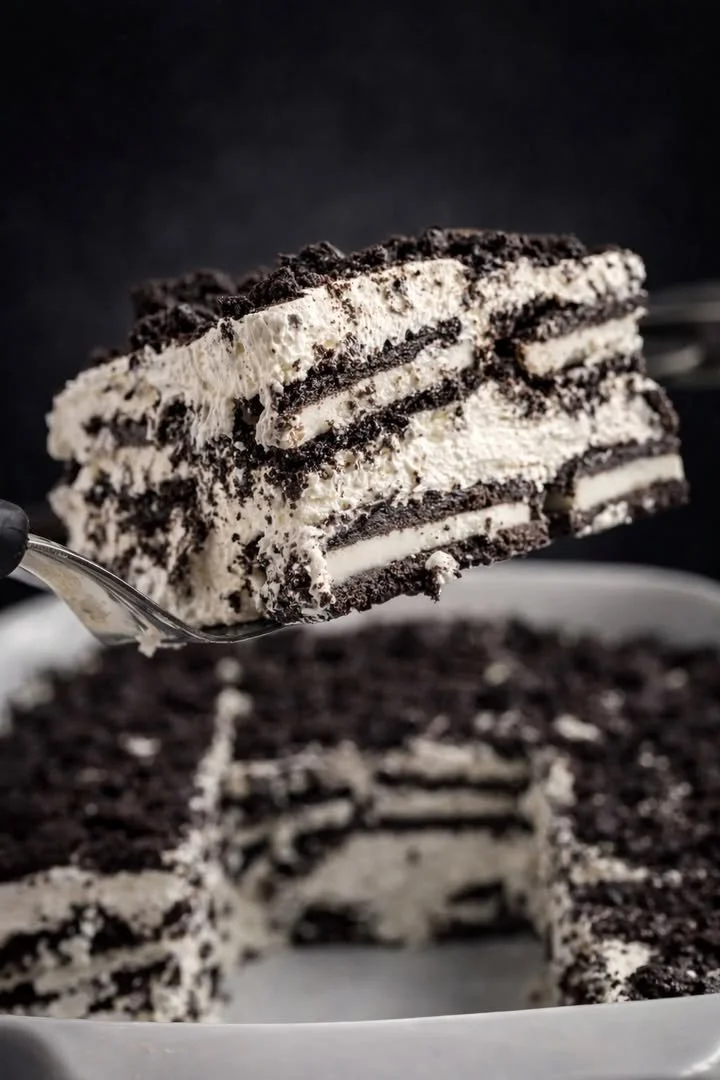
Serving Suggestions
When it comes to serving the Oreo Icebox Cake, I love to cut it into squares and place them on decorative plates for a fancy touch. A simple dollop of whipped cream and a sprinkle of crushed Oreos on top elevates the presentation. Sometimes, I pair it with fresh berries like strawberries or raspberries, which not only add a pop of color but also balance out the richness of the cake beautifully.
Alternatively, for a more casual gathering, I like to serve it right from the baking dish. It creates a warm atmosphere where everyone can dig in and help themselves. Icebox cake feels so homey, and I always engage my friends or family in a friendly debate about who gets the last piece—it adds to the fun spirit of the dessert!
Lastly, for those hot summer days, it’s an ideal treat to serve at barbecues or picnics. Just remove the cake from the fridge shortly before serving to let it soften a bit, making it easier to slice!
Variations & Customizations
While the classic Oreo Icebox Cake is unbeatable, there are many fun twists you can explore. For a peanut butter lovers’ version, incorporating peanut butter into the cream filling takes it to another level. A heavy spoonful mixed in could create the most delicious harmony! You could even sprinkle some chopped peanuts on top for added crunch!
I also love experimenting with seasonal flavors. Adding crushed peppermint candies around the holidays gives it a refreshing taste and vibrant color. Similarly, you can use seasonal cookies in place of Oreos, like ginger snaps for a fall flavor that pairs well with the creaminess of the topping.
For my friends who enjoy things a little more decadent, you can consider a chocolate ganache drizzle on top or between layers. It elevates your Icebox Cake from delicious to absolutely indulgent!
How to Store, Freeze & Reheat
When it comes to storing leftovers, I usually cover the baking dish with plastic wrap and pop it back in the fridge. It’ll last for about 3-4 days, but I promise it rarely lasts that long in our house! I recommend slicing it up to make grabbing a piece easier, especially if we have friends over.
If you want to store it for a longer time, you can freeze the cake before serving. I typically cut individual pieces and wrap them tightly in plastic wrap and then in foil. They’ll keep well in the freezer for about two months—just don’t forget to label it! When I need an emergency sweet fix, I let them thaw overnight in the fridge; they taste just as good as the day I made them.
One thing I wouldn’t recommend is reheating it in the microwave. The Icebox Cake is best served cold, so bringing it back to room temperature in the fridge is the way to go. This way, you retain that lovely texture and flavor without compromising the experience!
Conclusion
So there you have it—my personal take on the cherished Oreo Icebox Cake recipe! I hope you find as much joy in making and sharing this dessert as I do. It has a way of bringing people together, whether during casual get-togethers or special celebrations. The combination of flavors and textures makes it a crowd-pleaser, and I always look forward to the smiles it brings. Happy baking, everyone!